Monday, January 21, 2019

Part One: Salvaged Parts from Samsung Washing Machine WD0704CQQ


On 1st Jan 2019, I decided to disassemble my washing machine that had failed a few weeks before. I was not able to diagnose the cause of failure and it would cost too much to pay for Samsung's tech service just to come to tell me what was wrong. As I was curious to see how many interesting or useful parts I could find in it, I chose not to simply trash the entire thing away.


Besides the dozens of screws, bolts, nuts, and washers which can be reused, I found a whole bunch of other items that have the potential to be repurposed or used as parts in a project build.


This is Part One of the list of items, which covers sensors, electrical and electronic components. Part two will continue with the list and includes mechanical parts. If you are not into electricity, you will find the list of items in Part Two more interesting.


1. Pressure Switch
This part detects the water level in the drum to control the inflow of tap water into the washing machine.


Close up inspection reveals the part number of the switch http://applianceoasis.com/shopping/dn-s14t-samsung-washer-water-pressure-switch/


2. Inductor Coil
I found this plugged into the power control board, which has been discarded into the e-waste bin.

Similar to this:
https://www.aliexpress.com/item/Wuxi-SEG-EI48-20-30W-inductor-coil-DC26-00009D-current-3A-inductance-8-5mH/32807022086.html


3. Water Inlet Valve
https://www.ebay.co.uk/itm/LG-SAMSUNG-WASHING-MACHINE-TRIPLE-WATER-INLET-VALVE-WD-J1255-DC62-00142A-/273309758835

4. Noise Filter


Definitely not for making the washing machine turn more silently. :)


5. Drain Pump Assembly


6. Electronic Control Board
Lots of tack switches, a loud buzzer, a rotating dial selector, and maybe the number display could be removed for other electronic projects.


7. Ceramic Heater
This is a 2000W heater element that seems to be coated in ceramics. Have already given this away.


8. Direct Drive Motor
This is one hefty motor. Potential uses for this motor include powering a bicycle or as an electric generator.


I could get well over 40VAC from it when the motor is turned by hand if I spin it fast enough. See how bright it powers an AC LED bulb in this clip - https://www.youtube.com/watch?v=OR5Mc-1kYyQ
This is the end of Part One. See an even more interesting list of parts in Part Two, especially the mechanical parts in the latter half of the list there.


Part Two: Salvaged Parts from Samsung Washing Machine WD0704CQQ


This post is a continuation of Part One. If you are only interested to see the non-
electrical parts, scroll to item #14 onwards.

9. Condenser Dryer Evaporation Unit
How does a condenser dryer work inside a washer-dryer combo machine, you ask? Well, watch this video. :) https://www.youtube.com/watch?v=EYPCL9jsrwQ
This unit houses several parts. See items, 10, 11,12 and 13.


10. Evaporation Heater Element
This heater element served to evaporate moisture from the drying cycle of the machine.
Careful inspection reveals markings on this heater element, showing that it uses 1600W of electricity.


11. DC Motor
Taken from the evaporation unit (see item 9 above), this is a 17.5V DC motor.

Close up shows that it uses 608 ball bearings instead of bushings. A sign of good quality motor build, unlike many of the motors used in cheap home fans these days.


12. Sealed Thermostats
Two pieces of these were found in the Condenser Dryer Evaporation unit (item #9).


13. Temperature Sensor (Thermistor)
Nothing more to say about this simple sensor except that it is probably a useful sensor for many IOT projects.


14. Flexible Rubber Hose Connectors
Various sizes and all come with quality clips. Easy to reuse them in gardening or plumbing projects.


15. Pair of Spring Coils


These coils suspend the weight of the entire drum and its contents. My unscientific testing shows that each spring takes about 50kg to stretch to twice its length. Pretty strong. Might be good for building a suspension chair or something like that.


16. Metal Drum
This is going to someone who will use it as a container for burning paper offerings to the deities.


17. Steel Frame Body & Back Cover
 

A smiley face adorns the cover plate at the back of the machine frame. It might seem like an odd place to be putting such a design on the machine since nobody ever gets to see it. But after thinking about it more, I realised it is likely to be a purposeful design strategy because anyone who needs to access the back of the washing machine is probably not having a good day. :D

With some plywood and a little creativity, I could see this being turned into a unique storage cabinet or some form of pet house.


18. Door Frame

The glass dome has been removed (see next item). The shiny chrome finish of rim is maintained and the hinge still works. Can easily be made into a round window by inserting a piece of flat glass.


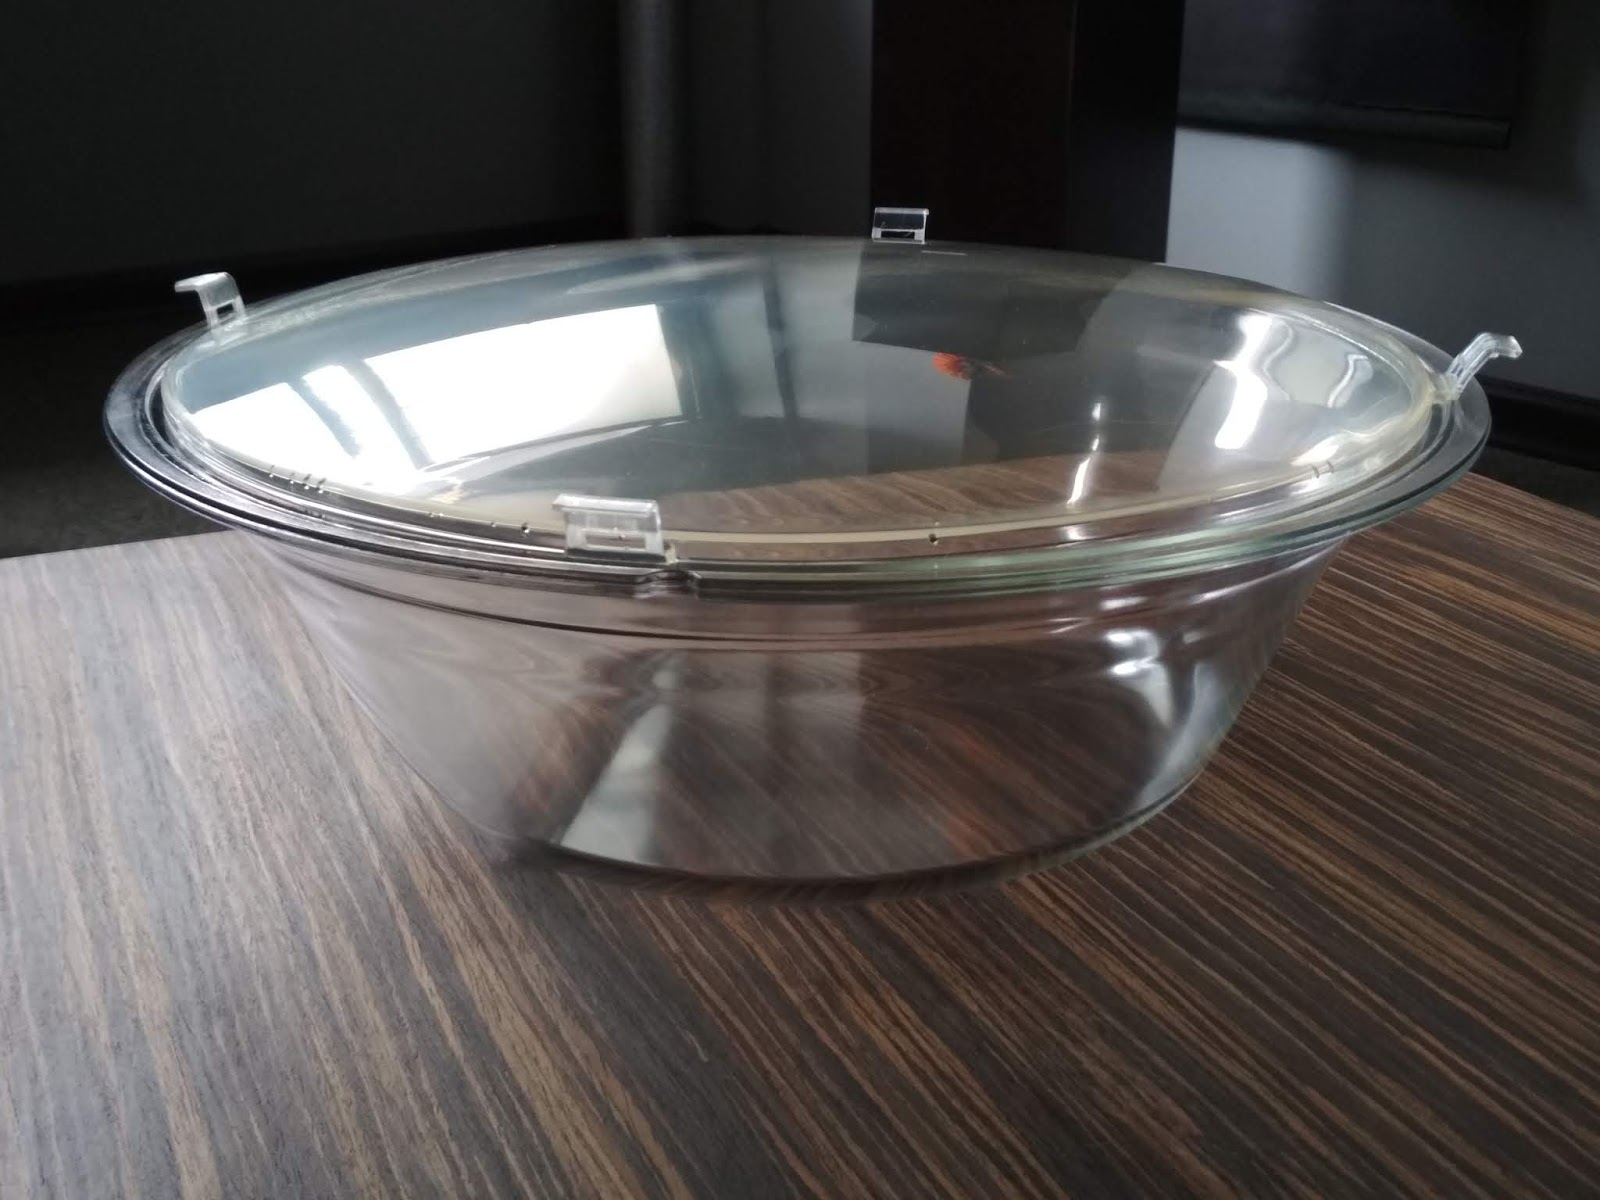
19. Glass Door with Plastic Shield


Glass Door


Plastic Shield 
Very obvious to me what this is good for. I have given this to someone who will use it that way. Hopefully, a photo of it in action will be posted here soon.


20. Twelve Kilograms of Solid Cast Iron Encased in Plastic

Comes in 2 pieces of 6kg weight. Not exactly the best shape to use like a dumbell. but should be more usable once ropes or straps are attached to the existing holes found on them. Most likely I will make them into a weighted vest, which isn't exactly a cheap item to buy from the store.


https://www.decathlon.sg/p/8313278-3053-10-kg-weight-training-weight-gilet.html


These weights were originally attached towards the front of the washing machine to provide added stability. Now you know why a washing machine is so heavy!


That's all folks! If you haven't checked out Part One of the list, you should go there now, especially if you are into electronics and electrical stuff.

Tuesday, March 4, 2008

PC Case Mod - Netted Side Panel

I've heard of folks who leave their PCs open in order to keep them cool without having to invest in anything. As a result, their PC would look something like this:

I used to be one of such people who sacrificed the protection of the PC's internal parts for the sake of reducing heat build-up, as well as for the ease of accessing the parts in the computer. I found it difficult to remove the side cover everytime I want to check something inside. But leaving the case open is put my computer at risk of foreign object invasions (e.g. insects, pets etc), not to mention the dust build-up over time, all of which could have disastrous consequences.
That is until I thought of the idea to make a side cover that is easy to remove and put on, allows for as much ventilation as possible, while still offering the necessary protection from dust and foreign objects.

Wednesday, February 27, 2008

Repair faulty buttons of your remote control in 15 minutes!

One of the most commonly faced problems in remote controls is the "dead" button syndrome. Do you hate that you'll have to dump the remote simply because only one or two buttons are not functioning? Well, fret no more! The fact is that most remotes with this problem can be repaired more easily that you thought possible. And believe it or not, all you need are some double-sided tape and a small piece of aluminum foil from your kitchen.
I've been using this method to successfully keep my favorite universal remote control "alive" for over 7 years now.
It should be a pretty straightforward affair for anyone to strip apart the vast majority of remotes out there using a screwdriver. But there are some remotes which are constructed using the "snap-on" method. These could prove difficult to pry open.


Monday, February 25, 2008

Grocery Hook for Car Seat

Here's the first project, and it's something that takes only 5 minutes to put together once you managed to get the parts. They can be bits and pieces of things you already have lying around the house.
Dissatisfied with similar hooks bought at automotive shops, I decided to put this together with parts that I can find easily. 
Below are the supplies used:

- 2 recycled keyrings,
- A looped nylon strap (I took mine from a keyholder, but you can also use a velcro cable-tie, or any kind of flexible loop strong enough to hold some weight),
- A flat s-hook (I bought mine from Daiso, but you might be able to find them hardware or kitchen supplies stores)

Welcome to Mini DIY blog!

Whoever has the time and skills these days to pull-off a major DIY project like constructing a shoe cabinet, or re-tiling the bathroom? Leave the heavy stuff to the professionals and the hardcore DIY-ers. Here, I'm referring to the absolutely simple DIY tasks that the average Joe and Jane can manage. This blog allows me to share these DIY ideas and solutions.

I'm definitely no DIY expert, but I have done simple fixes and improvement for various things in and out of the home. These are easy-to-accomplish and fun projects that takes less than a weekend. Indeed, many of them can be completed within an hour! Also, such DIY projects often require only bits and pieces of stuff that we would normally trash. So it's a great way to be recycling too.

So what mini DIY projects am I talking about? How about repairing those faulty buttons on that favorite remote instead of dumping it? Or a simple solution to ventilate your computer yet keeping it dust-free inside? Maybe you haven't found a neat way to easily hang groceries behind your car seat? Stay tuned for such mini DIY fixes, plus tips and tricks I have picked up on my own, as well as those I may have found from other like-minded Mini DIY-ers out there.
Cheers!